Hey there, fellow developers! At Dasinfomedia, we know that collaboration is the backbone of any successful project.
Sharing your GitHub repository effectively with your development team is crucial for smoother workflows, version control,
and collective code excellence.
Let’s dive into an easy-to-follow, 8-step guide on how to share your GitHub repository.
Step 1: Log in to GitHub and Access Your Profile
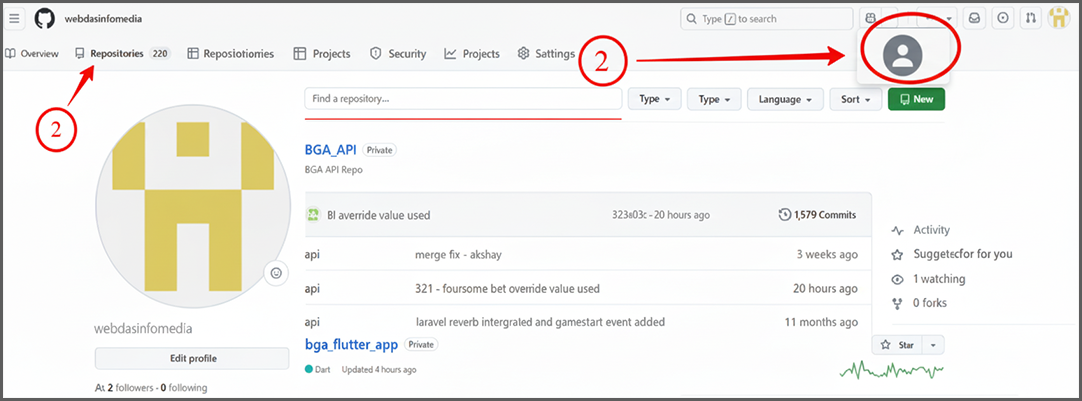
First, log in to your GitHub account. Then, click on your profile icon in the top-right corner of the page.

Step 2: Navigate to Your Repositories
From your profile dropdown, select Your repositories (or directly click the “Repositories” tab if you are already on your profile page), as indicated by arrow 2. This will display a list of all your repositories.
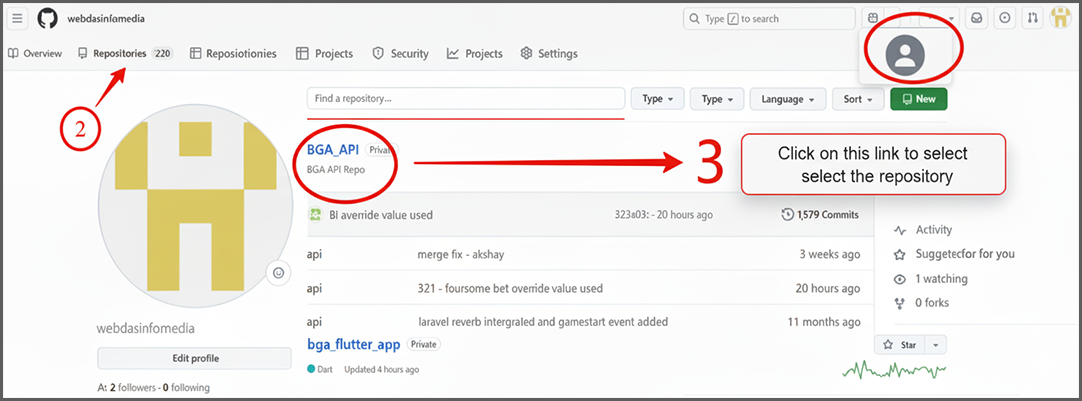
Step 3: Select the Desired Repository
From the list, click on the specific repository you wish to share. Arrow 3 points to an example repository named BGA_API.
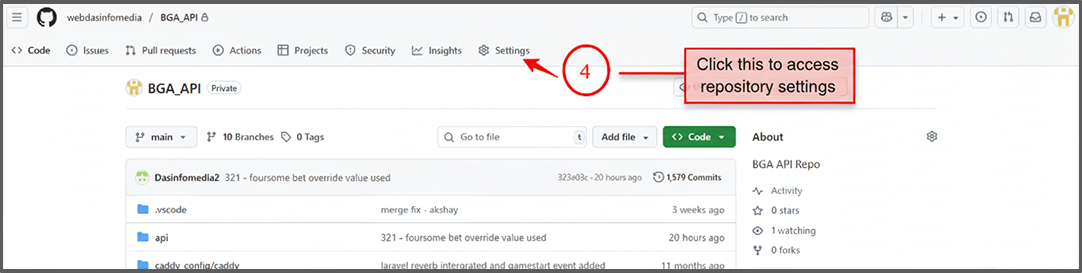
Step 4: Select the Desired Repository
Once you’re on the main page of your selected repository, click the Settings tab in the top navigation bar, indicated by arrow 4.
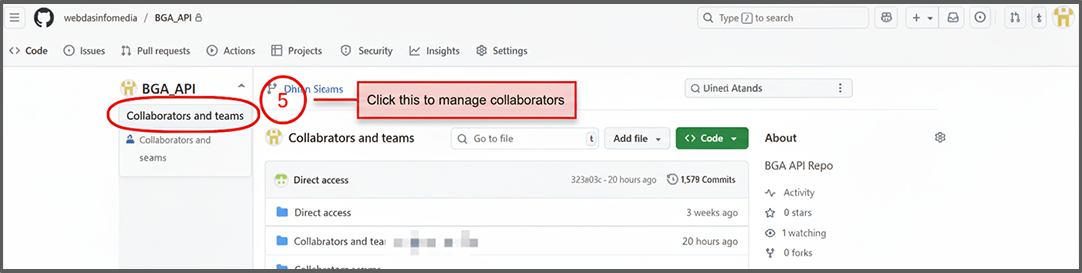
Step 5: Access Collaborators & Teams
On the Settings page, look for the Collaborators and teams option in the left sidebar menu and click on it. This is pointed out by arrow 5.
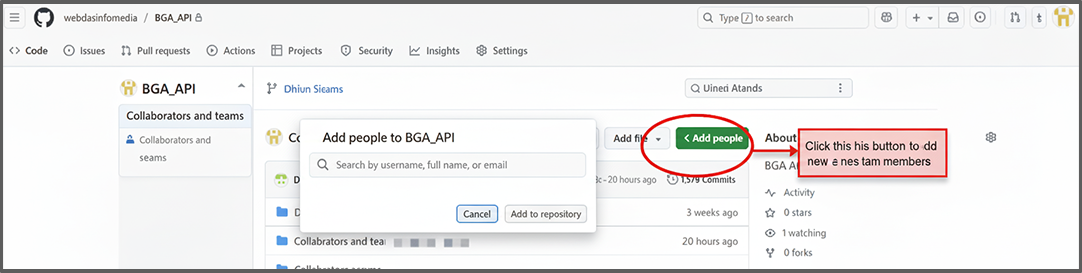
Step 6: Add People to the Repository
In the “Collaborators and teams” section, click the Add people button on the right side of the page, as indicated by arrow 6. A pop-up window will appear.
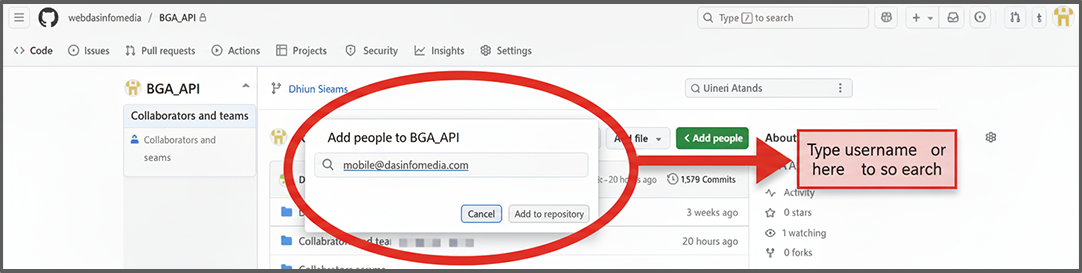
Step 7: Search for Team Members
In the “Add people to [repository name]” pop-up, type the GitHub username, full name, or email of the person you want to add into the search bar. Arrow 7 shows an example.
Sharing your repository is the first step toward a productive team. It helps everyone work together smoothly and write great code. To learn more about how Dasinfomedia can help your business, get in touch with them through their website.
Related Blogs